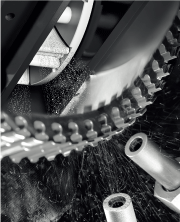
Shot peening as a means to extend the service life of components exposed to high bending, tensile and torsional stress has been around for decades. Yet, this technology is still shrouded in mystery and somewhat intimidating to its users. With its “all-inclusive” approach, Rösler Oberflächentechnik, a global market leader in surface treatment, has removed all uncertainties and makes the planning and implementation of shot-peening projects easy: The company’s focus is not only on the equipment selection but remains in close cooperation with the customers, and the Rösler engineering team has also developed the entire peening process including the underlying specifications like Almen readings, residual compressive stress values, coverage, etc. This makes all aspects of the process completely transparent!
The shot peening technology
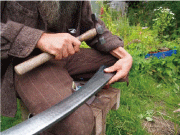
The original meaning of the verb "peen" means to flatten or straighten a piece of metal with a hammer and, along the way, strengthen its surface. Hammer peening was already practiced in the 19th century. For example, farmers were hammering their scythe to strengthen it and extend its usable life (picture 1).
Industrial peening by shot blasting began in the 1930’s. It received a big boost, when John A. Almen developed the Almen strip. For the first time this allowed objective measurement of the intensity of the peening process. Another milestone in creating a better understanding of shot peening was the use of X-ray diffraction to measure the residual compressive stress on a workpiece surface created by shot peening.
What exactly is shot peening, and what are its effects?
The atoms in the surface of a piece of manufactured metal are subject to tensile stresses created by stress-inducing manufacturing methods like heat treatment, welding, grinding, machining, etc. These tensile stresses can cause stress corrosion cracking (SCC) leading to premature failure. The inducement of a compressive stress in the upper material layers of manufactured metal pieces will relieve such tensile stresses. This is achieved by peening.
Shot peening, a cold working process, impacts the metal surface with small pellets (round metallic, glass or ceramic particles) with a high enough energy to deform the surface by creating little dimples (picture 2).
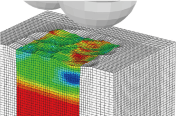
These cause the layer beneath to get compressed, generating a compressive stress below the shot-peened area.
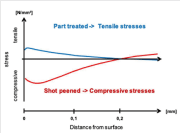
Expressed in simple terms: The "bad" tensile stress is transformed into a "good" compressive stress (picture 3).
At the same time, the plastic deformation of the surface closes existing micro cracks and prevents them from expanding (picture 4).
The benefits of shot peening
It enhances the resistance against tensile, bending and torsional stress
It prevents stress corrosion cracking due to wear
It prevents hydrogen embrittlement (HE)
It is not surprising that shot peening initially started in the automotive industry to improve the life expectation of valve springs, connecting rods, gears, camshafts, crank shafts, and engine blocks, etc…
It was quickly adapted to aerospace components for treating all kinds of fans, compressor and turbine blades, turbine & compressor shafts, airframe panels, and landing gear components, etc…
Today shot peening is used in many industries for improving the fatigue life of other components including orthopedic implants like knee femorals, tibia plates, hip stems, and the like…
A technical challenge - developing the shot peening process
Developing a shot-peening process and setting up its technical framework is as important as the actual equipment. In fact, the process pretty much dictates the equipment design.
Process development usually requires extensive test trials to establish the process specifications, of which the most important ones are briefly described below:
Measuring the shot-peening intensity with an Almen test
The Almen test is based on the fact that thin metal parts get distorted when exposed to blast cleaning:
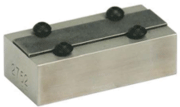
A metal strip made from carbon steel with a hardness of about 45 HRC is clamped onto a metal block (picture 5).
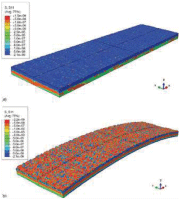
When exposed to a blast process, the clamped strip forms a convex arc. The arc height (Almen value) provides a good reading of the shot-peening intensity (picture 6).
Almen strips are classified into 3 types: "N", "A" and "C". They have the same length and width but differ in thickness. The thinnest strips, type "N", are used for peening with ceramic and glass beads. Type "A" strips, somewhat thicker, are mainly used in conjunction with steel shot and cut wire media. The thickest "C" strips are used for special peening applications.
The Almen test plays a crucial role in process development but is also a quality control tool for the actual shot-peening operation. Deviations of the actual Almen readings from the specified value are an indication that something is wrong with the process.
Peening coverage
Coverage measures the area hit by the blast media ("dimples") relative to the total surface area. A high coverage – around 98% -- is necessary to achieve an even and effective peening effect. The coverage is usually measured with a magnifying glass. Picture 7 shows a surface with different degrees of coverage.
Saturation
The peening effect is the result of the peening intensity (expressed as Almen value) and the duration of the peening process. The longer the process lasts, the higher the arc height of the Almen strip!
Saturation is reached when doubling of the exposure time results in an increase of the arc height of less than 10%.
Measuring compressive stress with X-ray diffraction
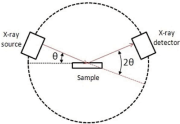
X-ray diffraction is used to analyze the physical properties of materials. A crystalline material sample is placed in the path of an X-ray beam (pictures 8 and 9). The X-rays diffract through the crystal onto a detector. The diffraction measures the strain in the crystal structure, from which the residual compressive stress can be deduced.
Determination of compressive stresses with X-ray diffraction is an essential tool for the development of shot-peening processes. But not every peening equipment supplier is utilizing this tool, because X-ray diffractometers are expensive.
The measurement itself is also quite elaborate: To establish a depth profile in a certain surface area, the material must be removed all the way to the desired measuring point. Therefore, this measuring point, for example a tooth on a toothed gear, must be easily accessible. X-ray diffraction is generally a destructive procedure.
Rösler offers the total peening solution
A comprehensive equipment line for air, turbine and wet shot peening in the market
The Rösler product line includes numerous peening systems for a wide range of different applications. The company offers solutions for shot peening automotive components like torsion bars, leaf springs, coil springs, disk springs, drive sprockets, drive shafts, connecting rods, crank shafts, etc.
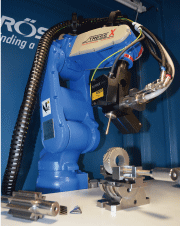
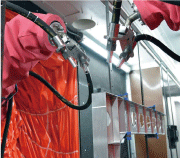
Through its French operation near Paris, the company provides peening equipment for aerospace applications, for example, landing gear components, all kinds of fan, compressor and turbine blades, turbine shafts, airframe panels, etc. (picture 10). The company also offers peening solutions for smaller workpieces like chain links, screws, etc.
Complete process development in-house
Though the equipment is no doubt essential for successful shot-peening operations, it is just one part of the story. That’s why, besides designing and manufacturing the hardware, Rösler also actively assists its customers in developing new peening processes from scratch or optimizing already existing peening operations.
Test centers in Germany and France
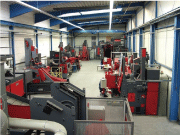
The company maintains specialized shot peening test centers in Germany and France, which are equipped with state-of-the-art equipment for peening by compressed air, turbines or wet blasting. In addition, the test centers are staffed with process engineers with a deep knowledge of shot peening in automotive, aerospace and other industries (picture 11).
In-house measuring capabilities
The test centers are also equipped with all diagnostic tools, including an X-ray diffractometer and all kinds of surface roughness measuring devices for Ra, Rz, Rt, Rmax…, including the latest 3D surface profile inspection technology.
Development of peening processes from scratch
Through extensive test trials, combined with compressive stress evaluations by X-ray diffraction, coverage analysis, Almen tests for defining the peening intensity and saturation time, the Rösler
engineers establish the process parameters.
These serve as a basis for the customer specifications to be listed in the customer work piece drawings.
Choosing the right equipment to meet the specifications and capacity requirements
Once a process has been established and the specifications approved by the customer, the most suitable and cost-efficient peening method and equipment must be chosen.
In this respect, additional processing trials might have to be conducted to determine if an air blast or turbine blast system is most suitable. To prevent warping of delicate components with thin walls, a wet-blast system might have to be considered. Based on the throughput requirements, the right machine can then be selected from the broad Rösler shot blast equipment portfolio.
Of course, whenever necessary, existing machine concepts will be modified to fully meet the customer’s peening specifications. Or, in extreme cases, where standard equipment might not be suitable, the Rösler engineers will develop tailormade equipment solutions to meet the capacity and quality needs of the customers.
Optimization of existing peening processes
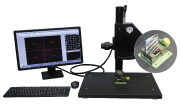
Through its TuneUp division, supported by qualified peening specialists, Rösler also offers complete audits of peening processes and equipment already in operation at the customer’s plant. Such audits can be quite extensive or simple (picture 13):
Frequently, an adjustment (“tweaking”) of the machine settings can produce tremendous quality improvements and cost savings. This may involve the use of different blast media producing better coverage or reaching the saturation point in faster cycle times. Occasionally, the optimization of the blast nozzle movement in air-blast systems or adjusting the blast pattern in turbine machines can have amazingly positive effects on peening quality and cycle times.
In certain cases, the installation of additional equipment components might be necessary, like a second pressure vessel in an air-blast system.
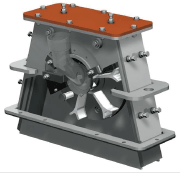
For certain shot peening applications, the switch from an air-blast to a turbine-blast system can reduce the energy consumption by more than 65 %. Or, in the case of existing turbine peening systems replacing the existing turbines with more modern ones, big improvements can be made. For example, the Rösler Gamma turbines with curved throwing blades help reduce energy consumption, improve the peening results in shorter cycle times, and substantially increase equipment uptimes (picture 14).
For Information:
Rösler Oberf lächentechnik GmbH
Vorstadt 1, 96190 Untermerzbach, Germany
Tel. +49.9533.924 116
Fax +49.9533.924-300
E-mail: G.Lodes@rosler.com
www.rosler.com
